


PROCESS

As technology has evolved, so has the profession of architectural illustration. Projects are ever-changing and have tight deadlines. Our process has incorporated current technologies to help meet clients’ needs. The ability to collaborate while working remotely has become increasingly more convenient. By utilizing screen sharing and cloud features, client and artist can effectively communicate design ideas and markups amongst the team.
In regards to the production aspect of the process, technology has been tailored to enhance and give flexibility to the analog skills of hand drawing and painting watercolor illustrations. We’ve tailored the capabilities of these technologies into a digital work flow which is intended to reflect the qualities of traditional media. These technologies are an aid, but just the same can be a crutch if you become over-dependent. It is paramount that the integrity of our hand-crafted imagery is not compromised, preserving the creative process that drawing fosters.
General Process

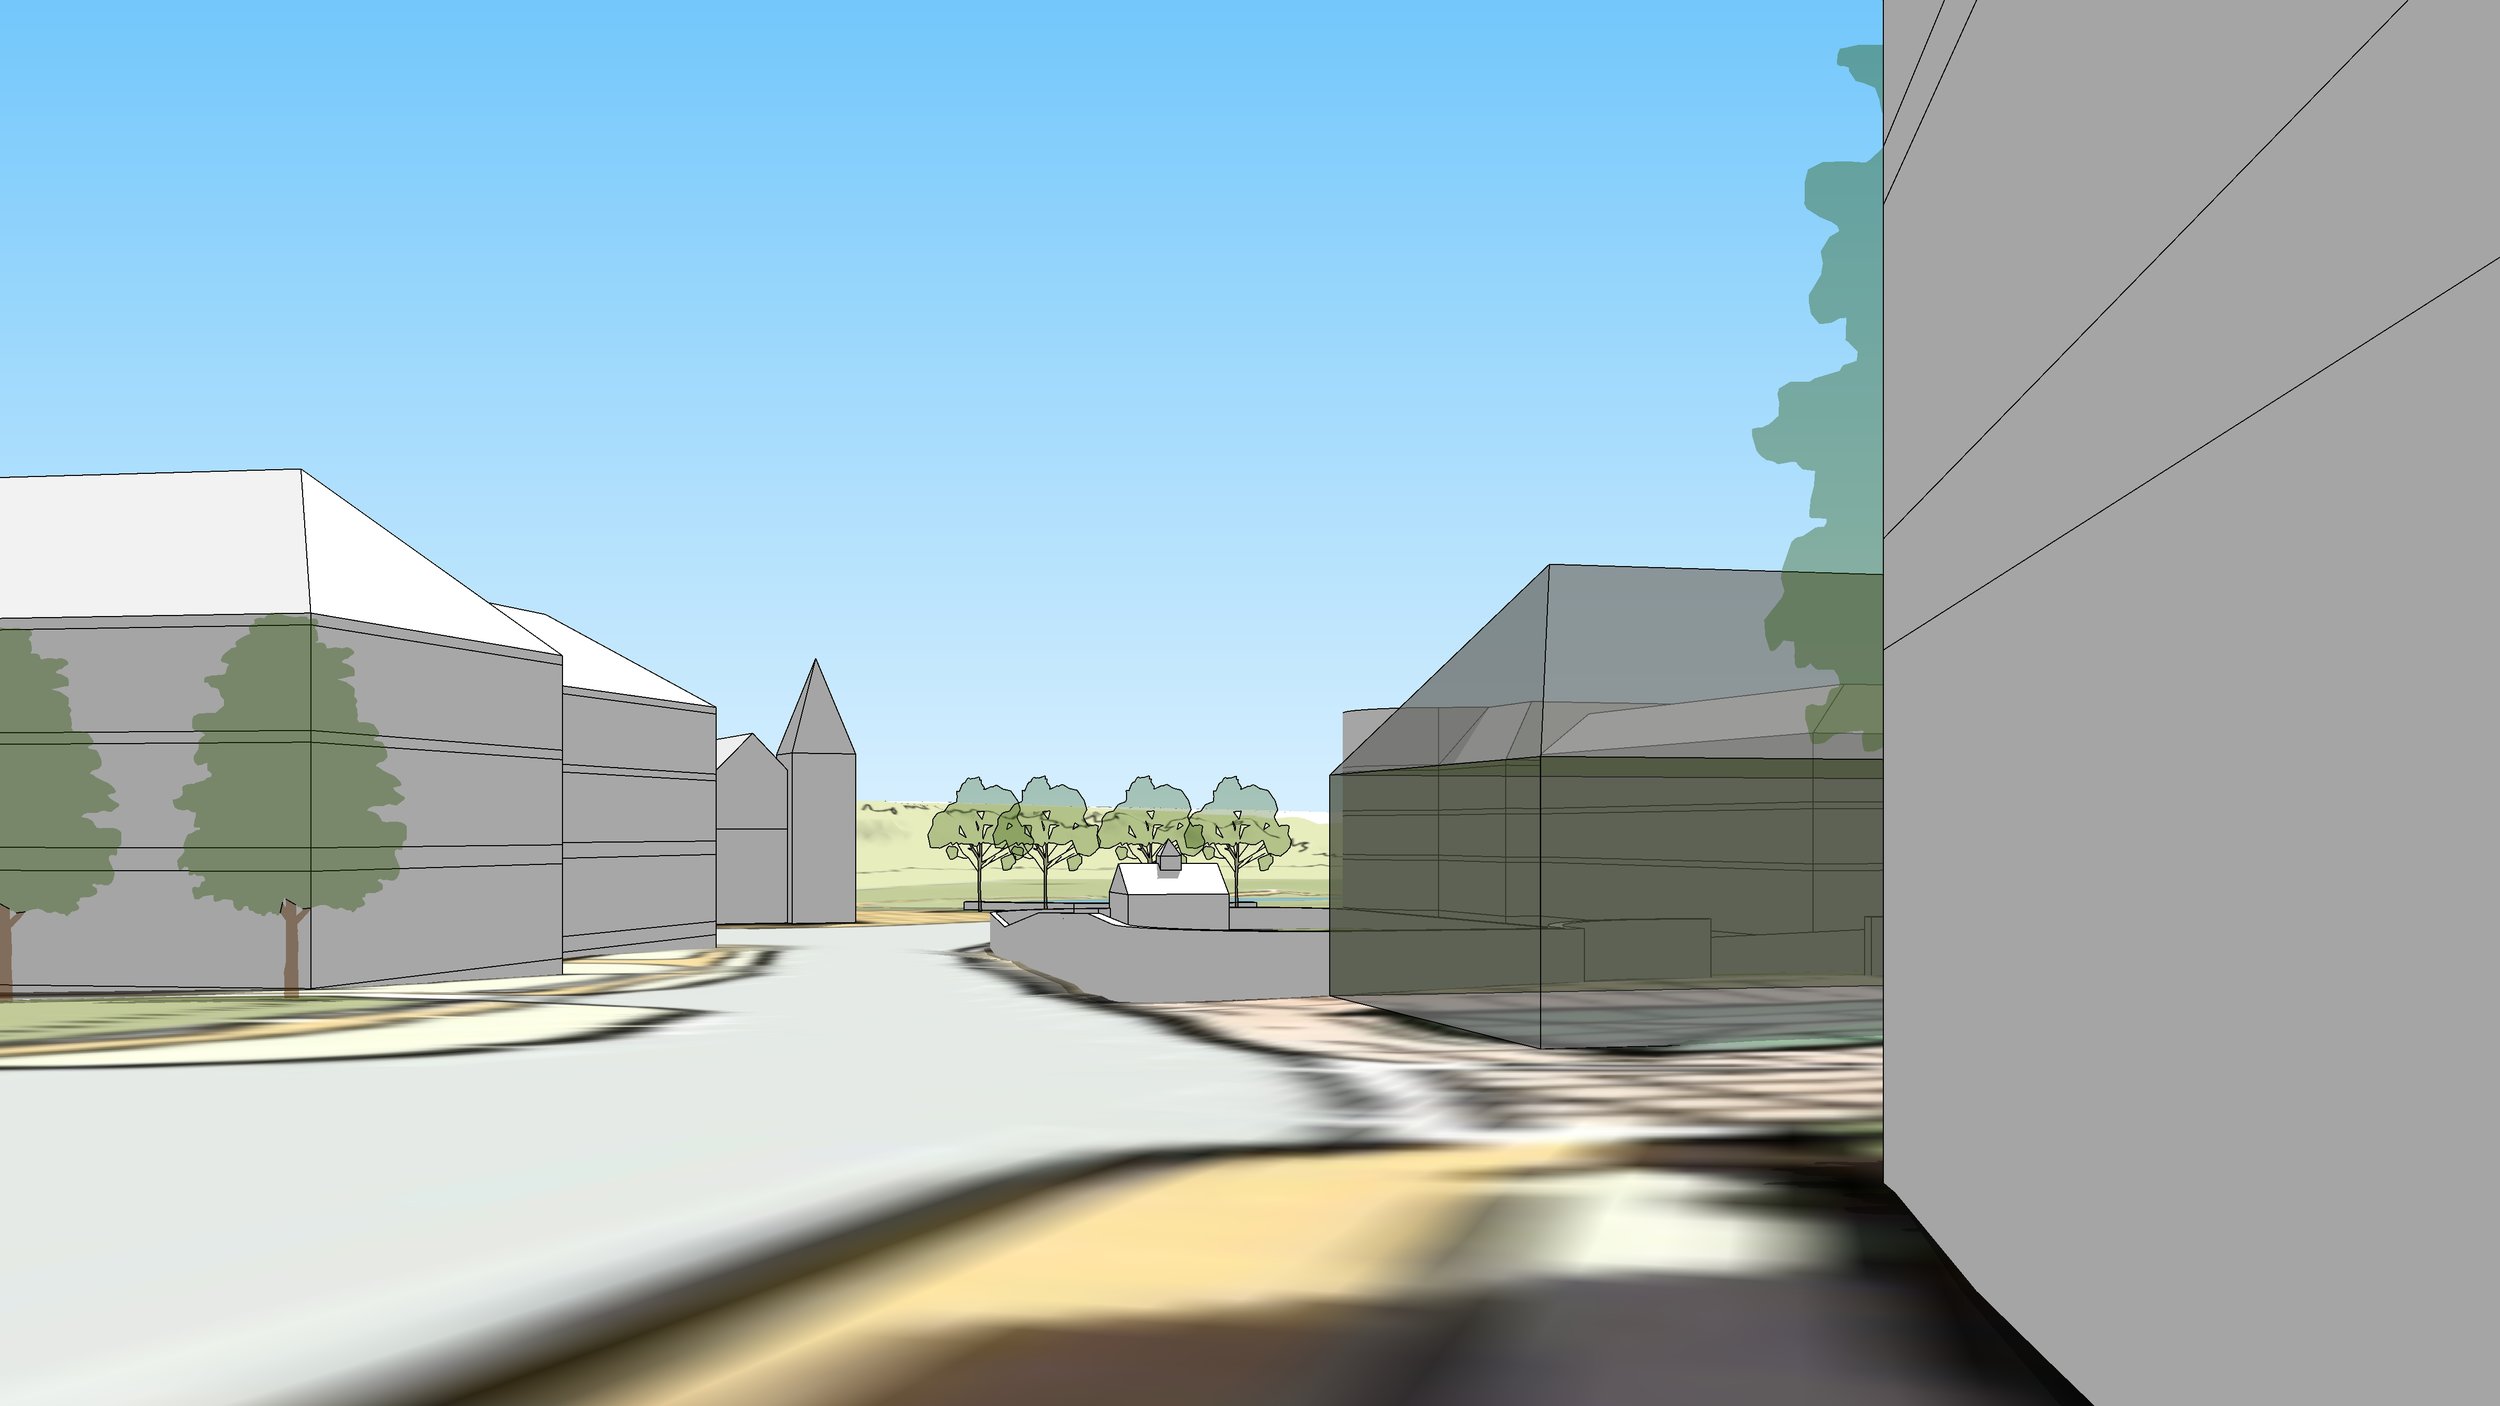
Step 1: Gathering information/modeling/View Selection
The first step calls for all available resources from the client. This may include 3d models, CAD plans/elevations, sketched plans/elevations, section diagrams, precedent imagery for architecture, landscape plans, or plant material list. If a 3d model is not provided, one will be constructed by us from the information provided. It is important to gain an understanding of what each view is trying to accomplish and the character it is trying to convey.
Once a model is generated, the most effective, evocative view options will be selected and approved by the team. Screen-sharing software is sometimes used to help guide the discussion so the team can view the model together when working remotely.
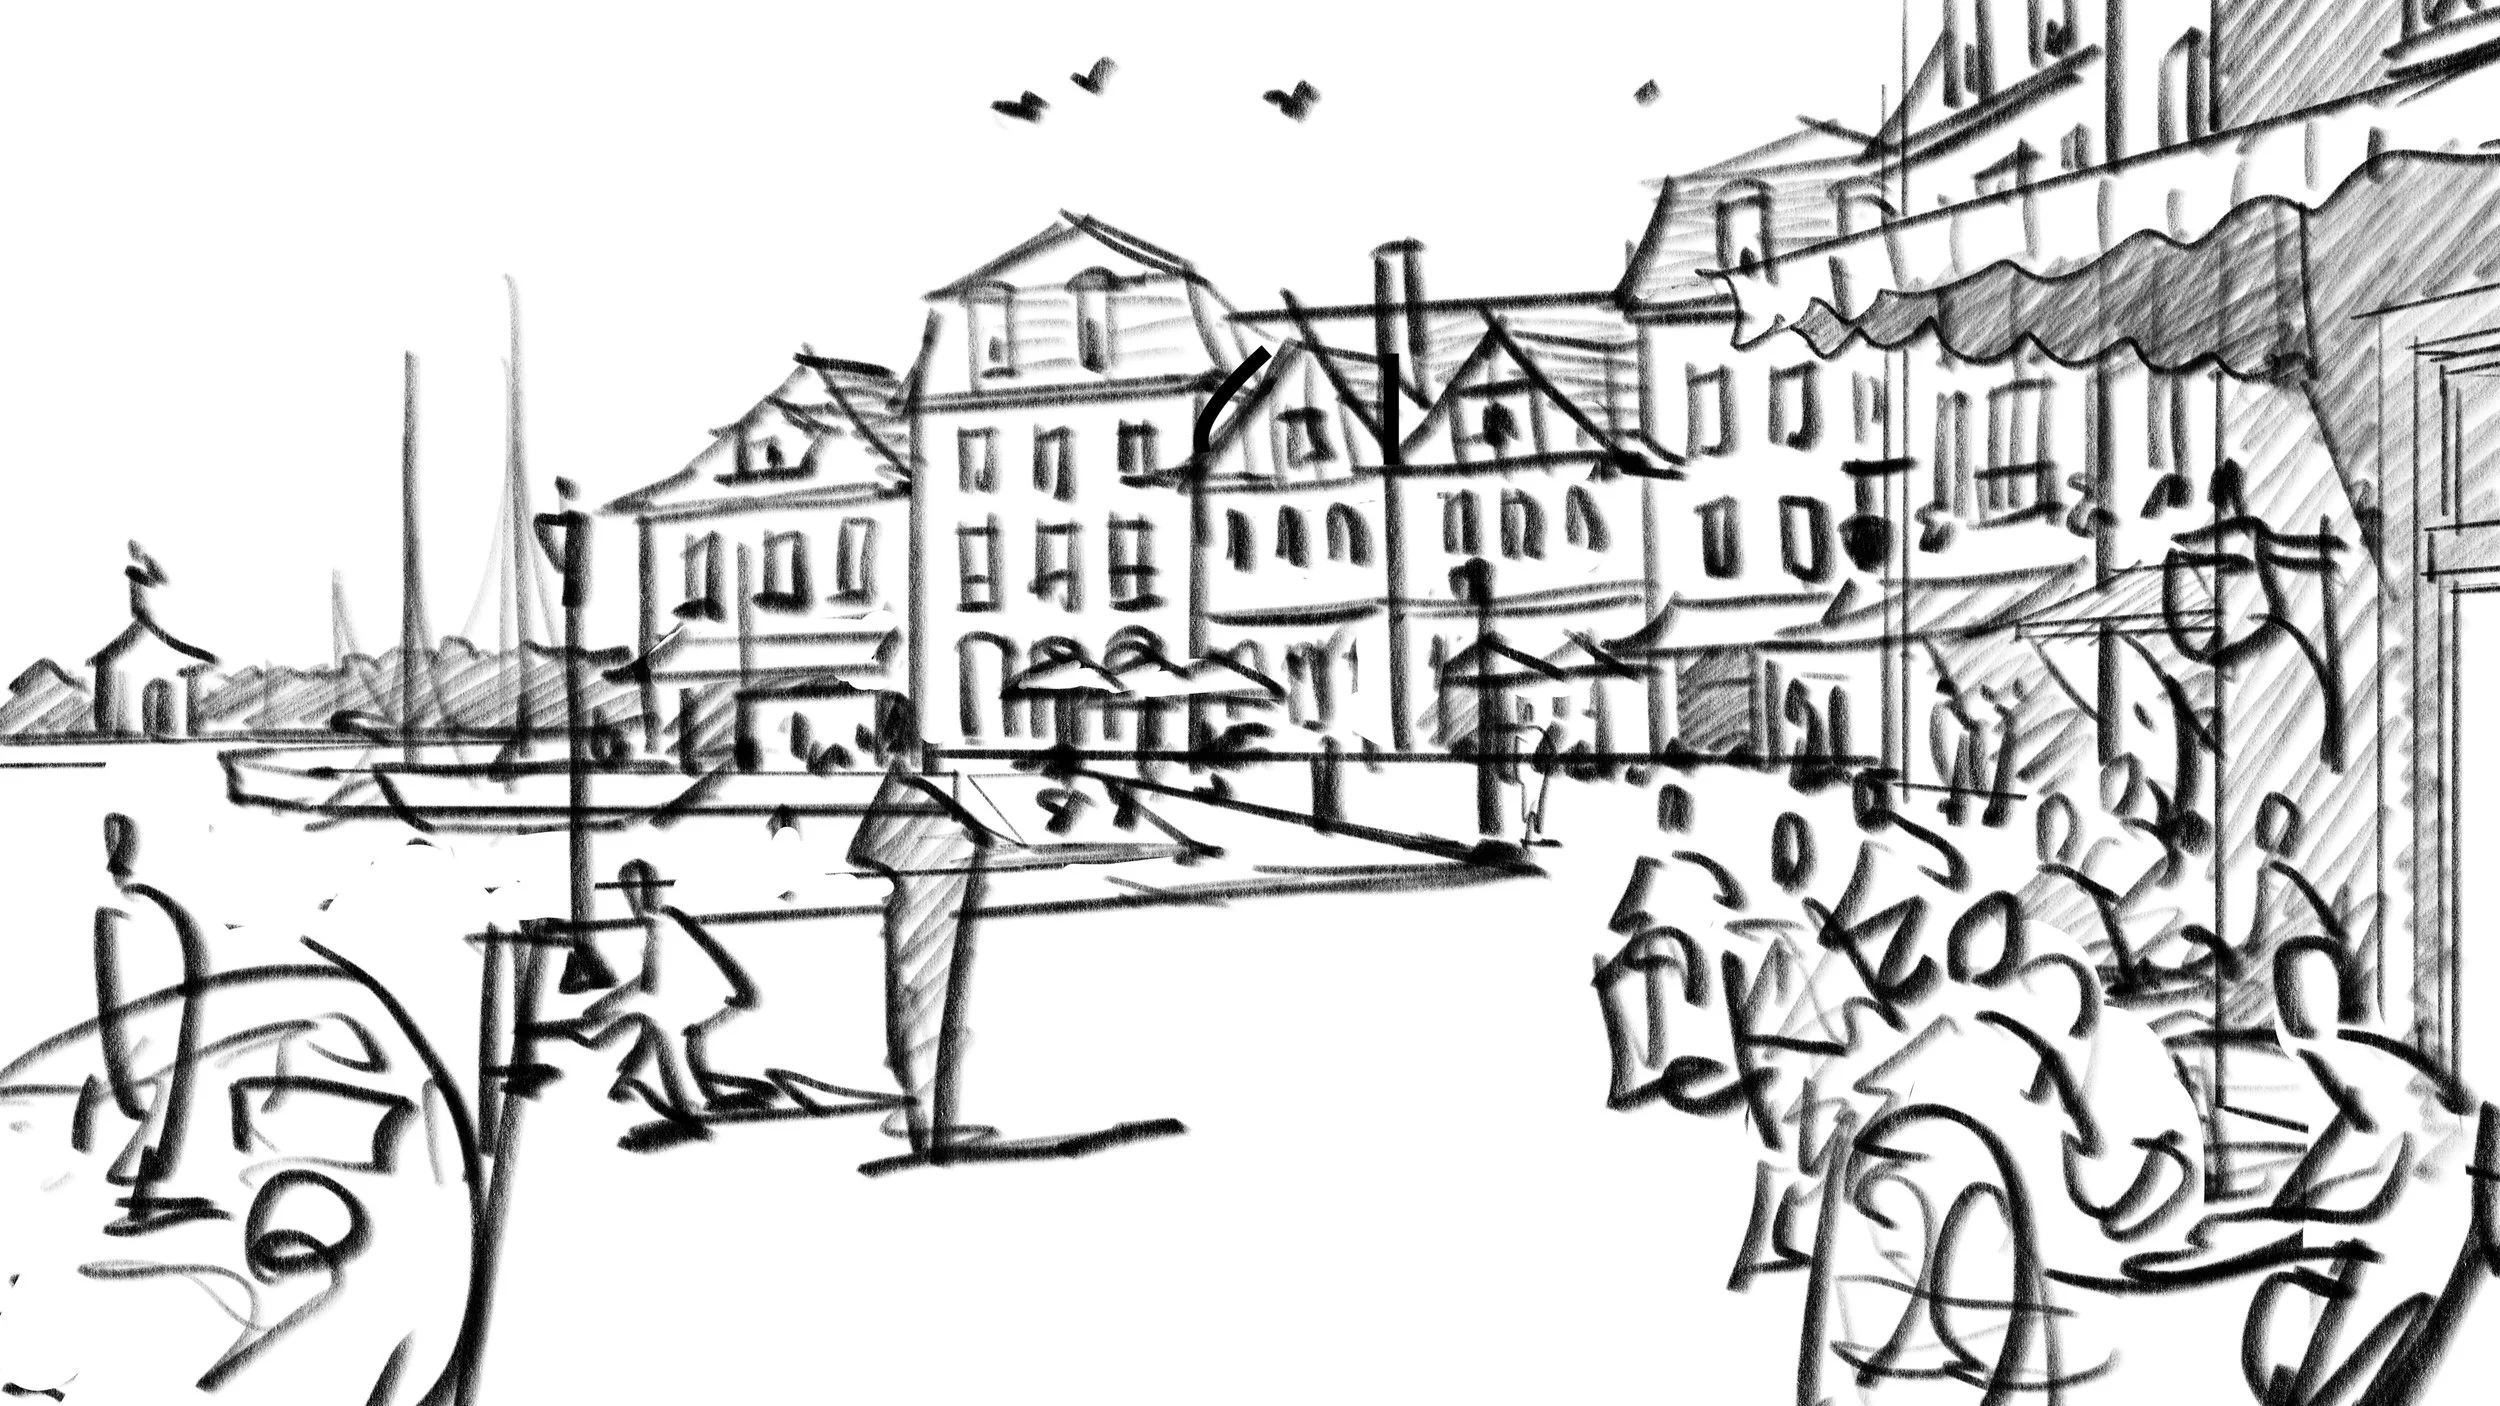
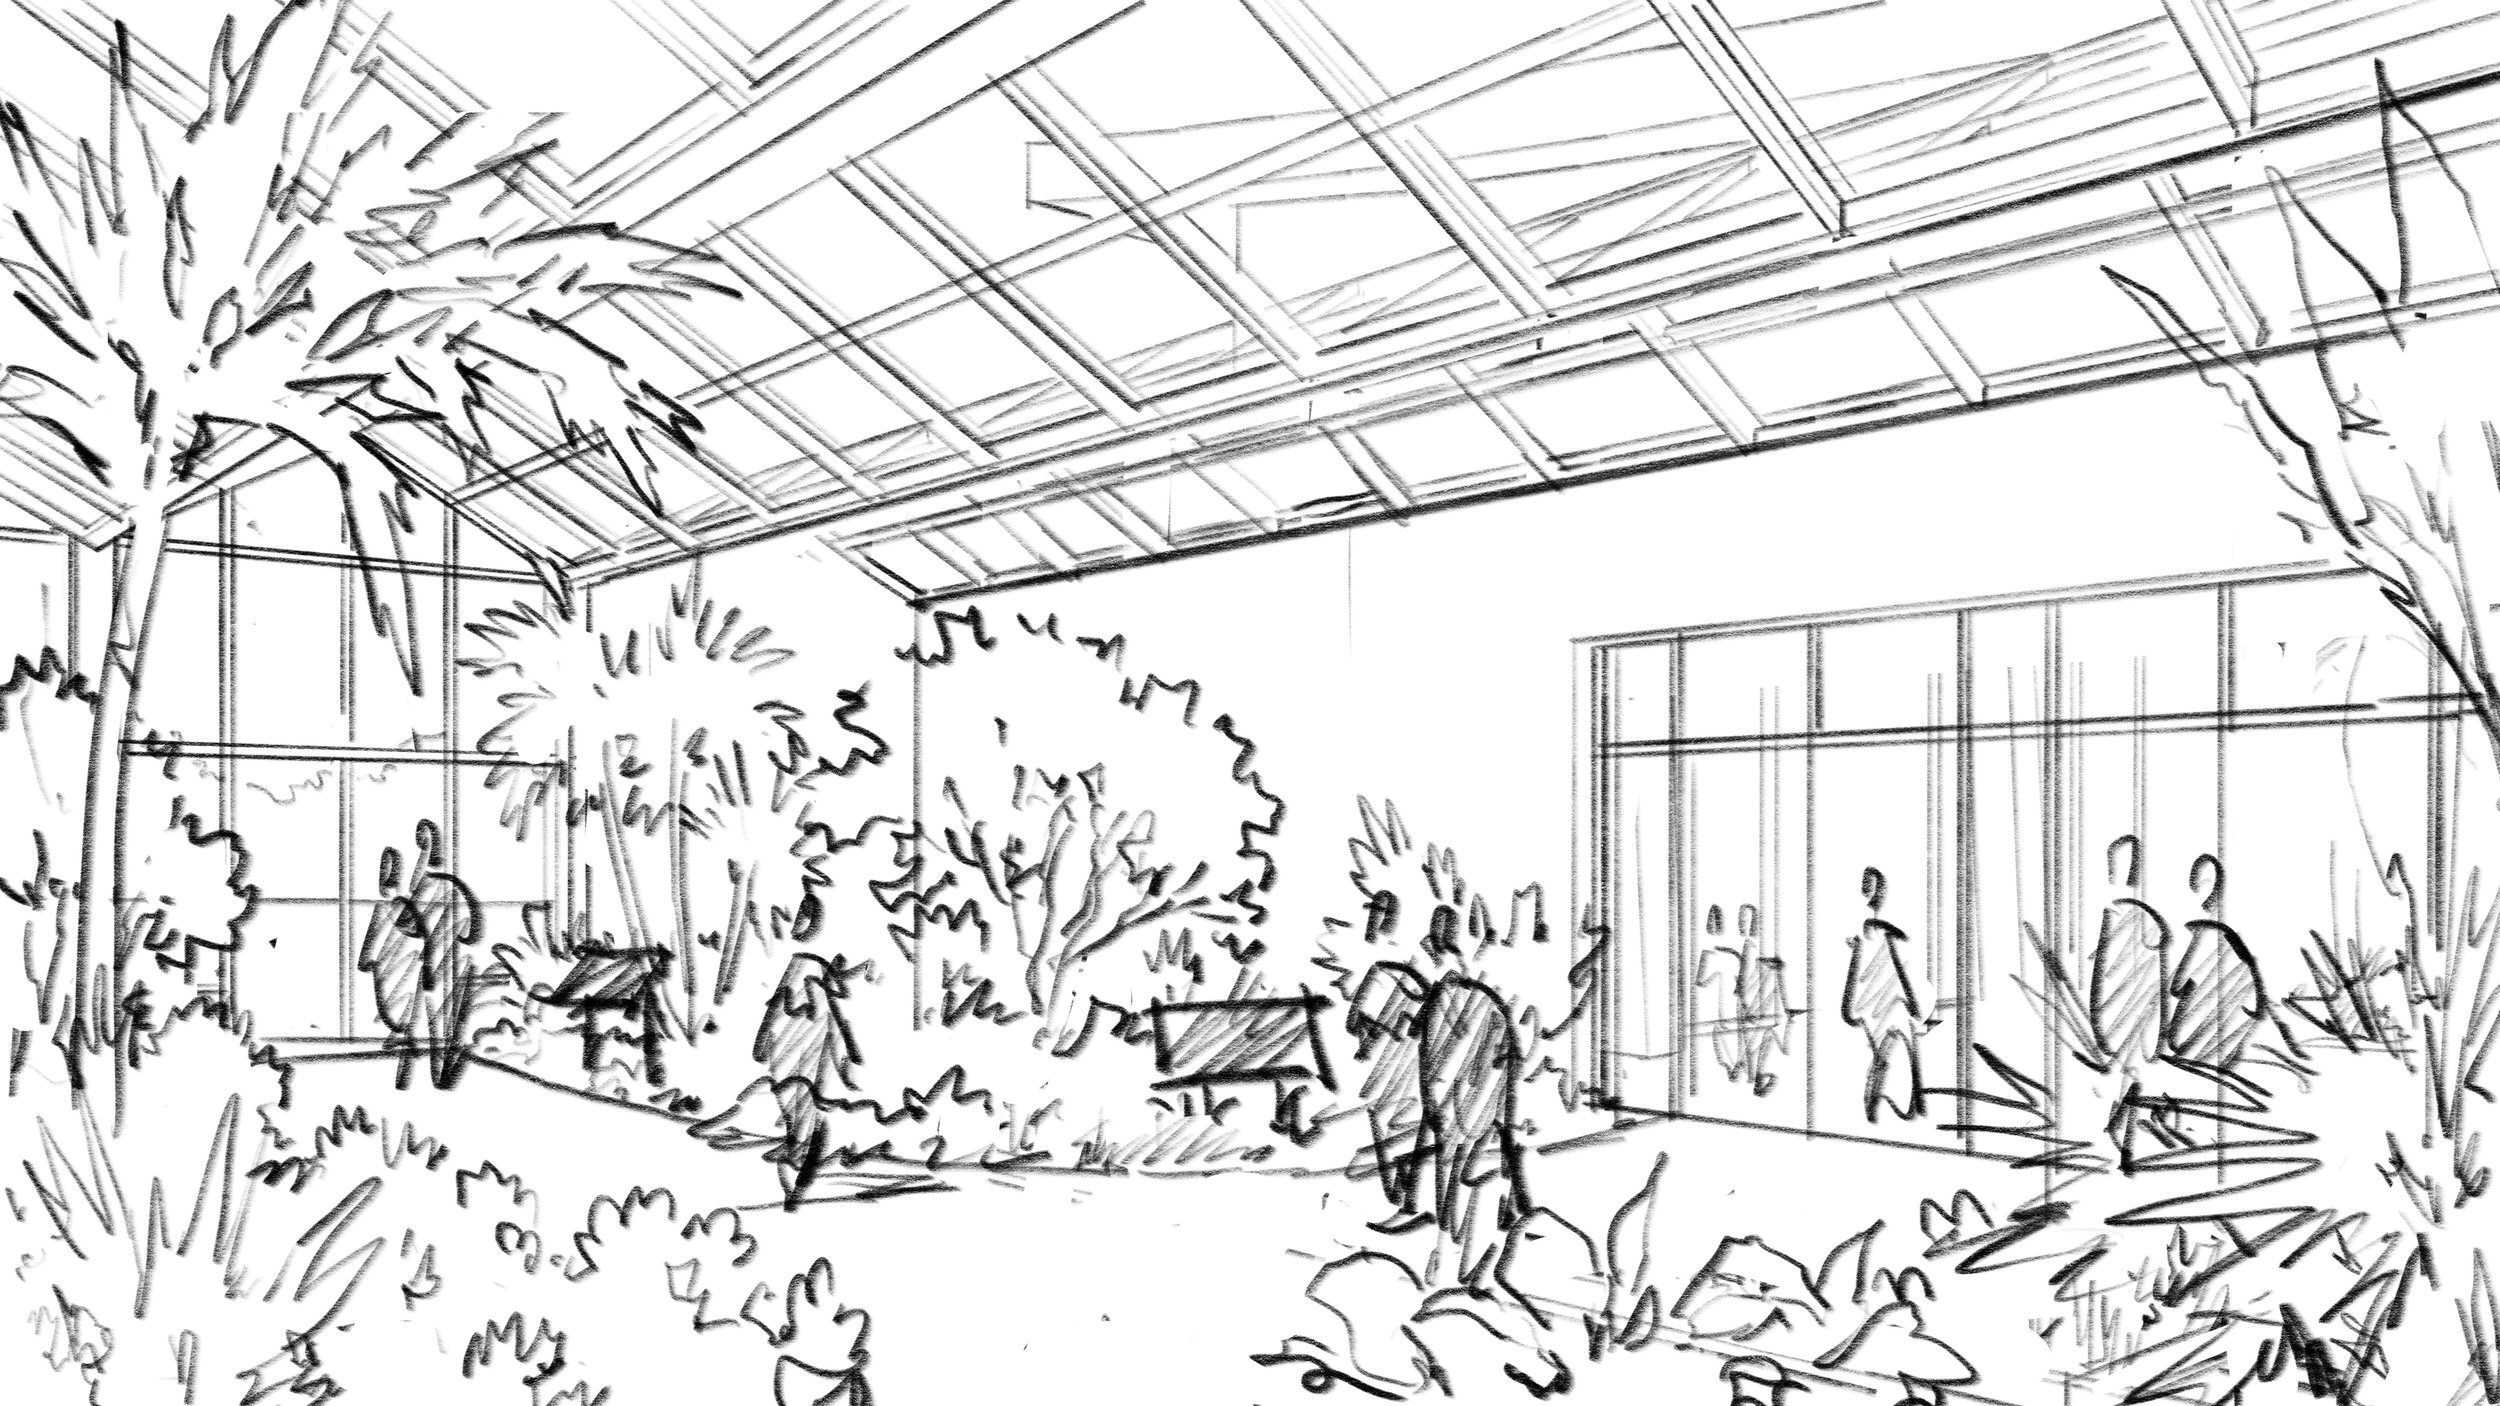
Step 2: Preliminary Drawing
Once the views are selected and approved, we proceed with sketching the preliminary concept. The image begins to be composed and will incorporate the design, character, and vision of the plan. Architecture and urban design elements begin to take shape, and the entourage and life of the perspective drawing are composed to reflect the story of the image. These elements give the drawing a sense of place, and help connect the plan to the audience on an emotional level.
The drawings will be reviewed and comments will be submitted before moving into the final drawing stage.

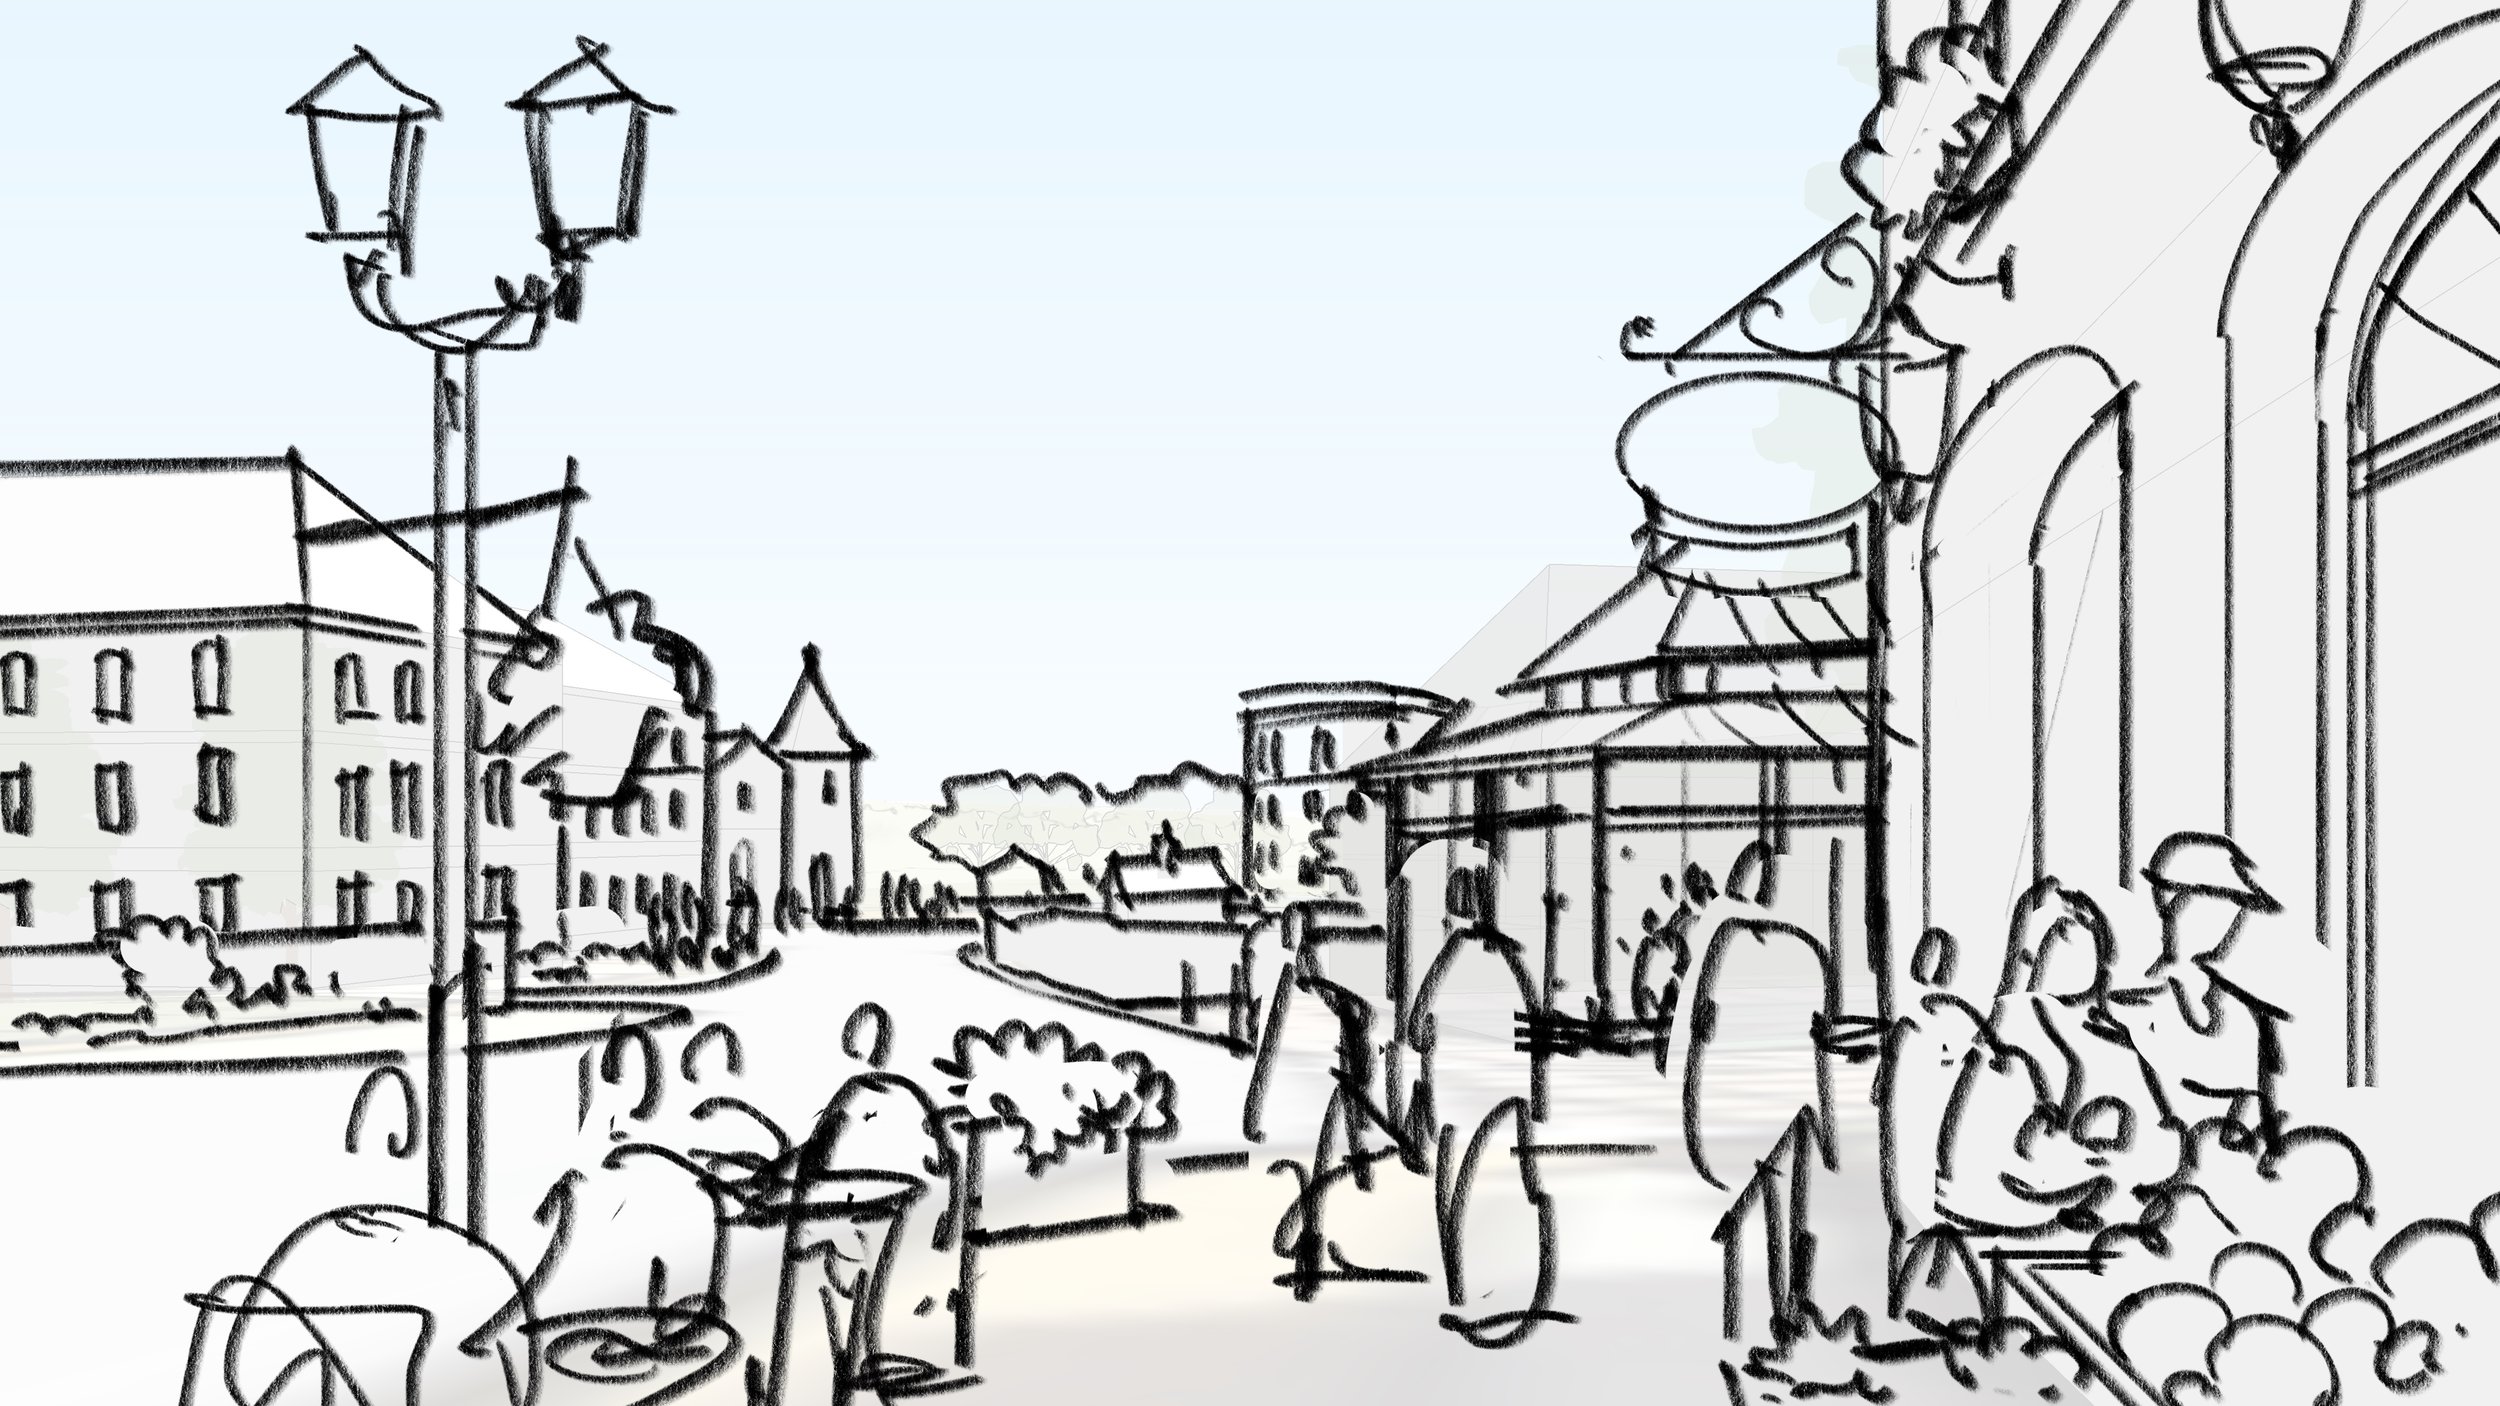
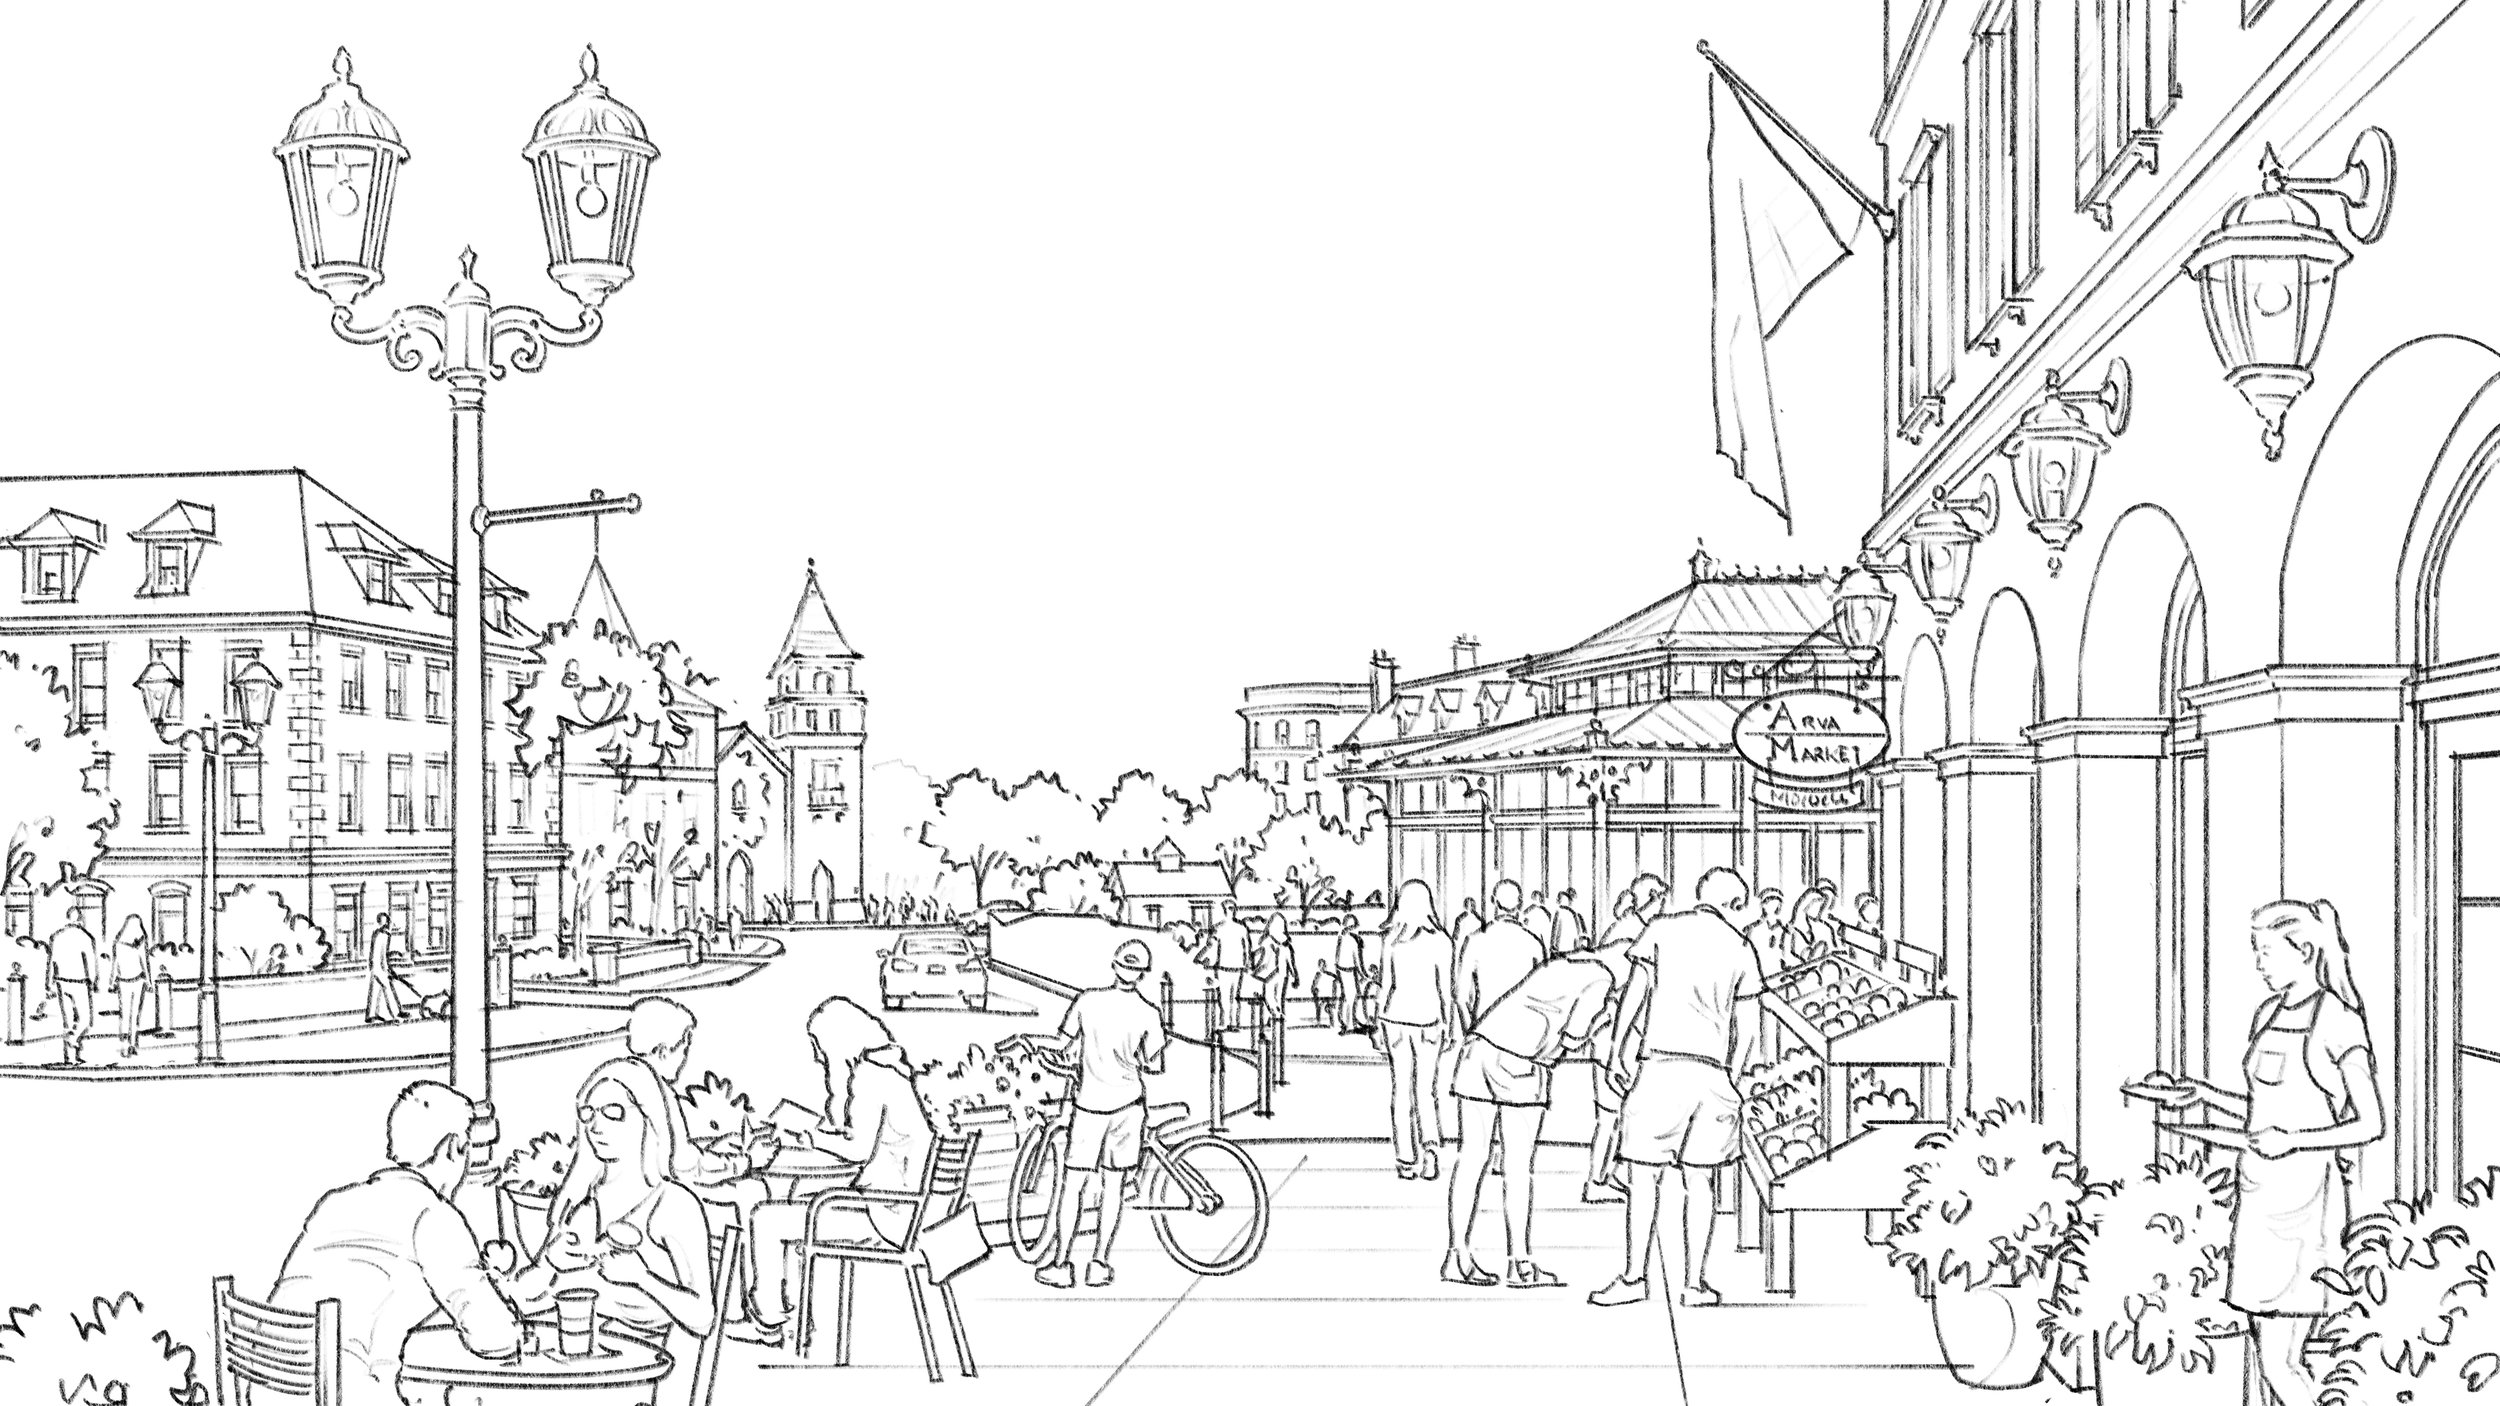
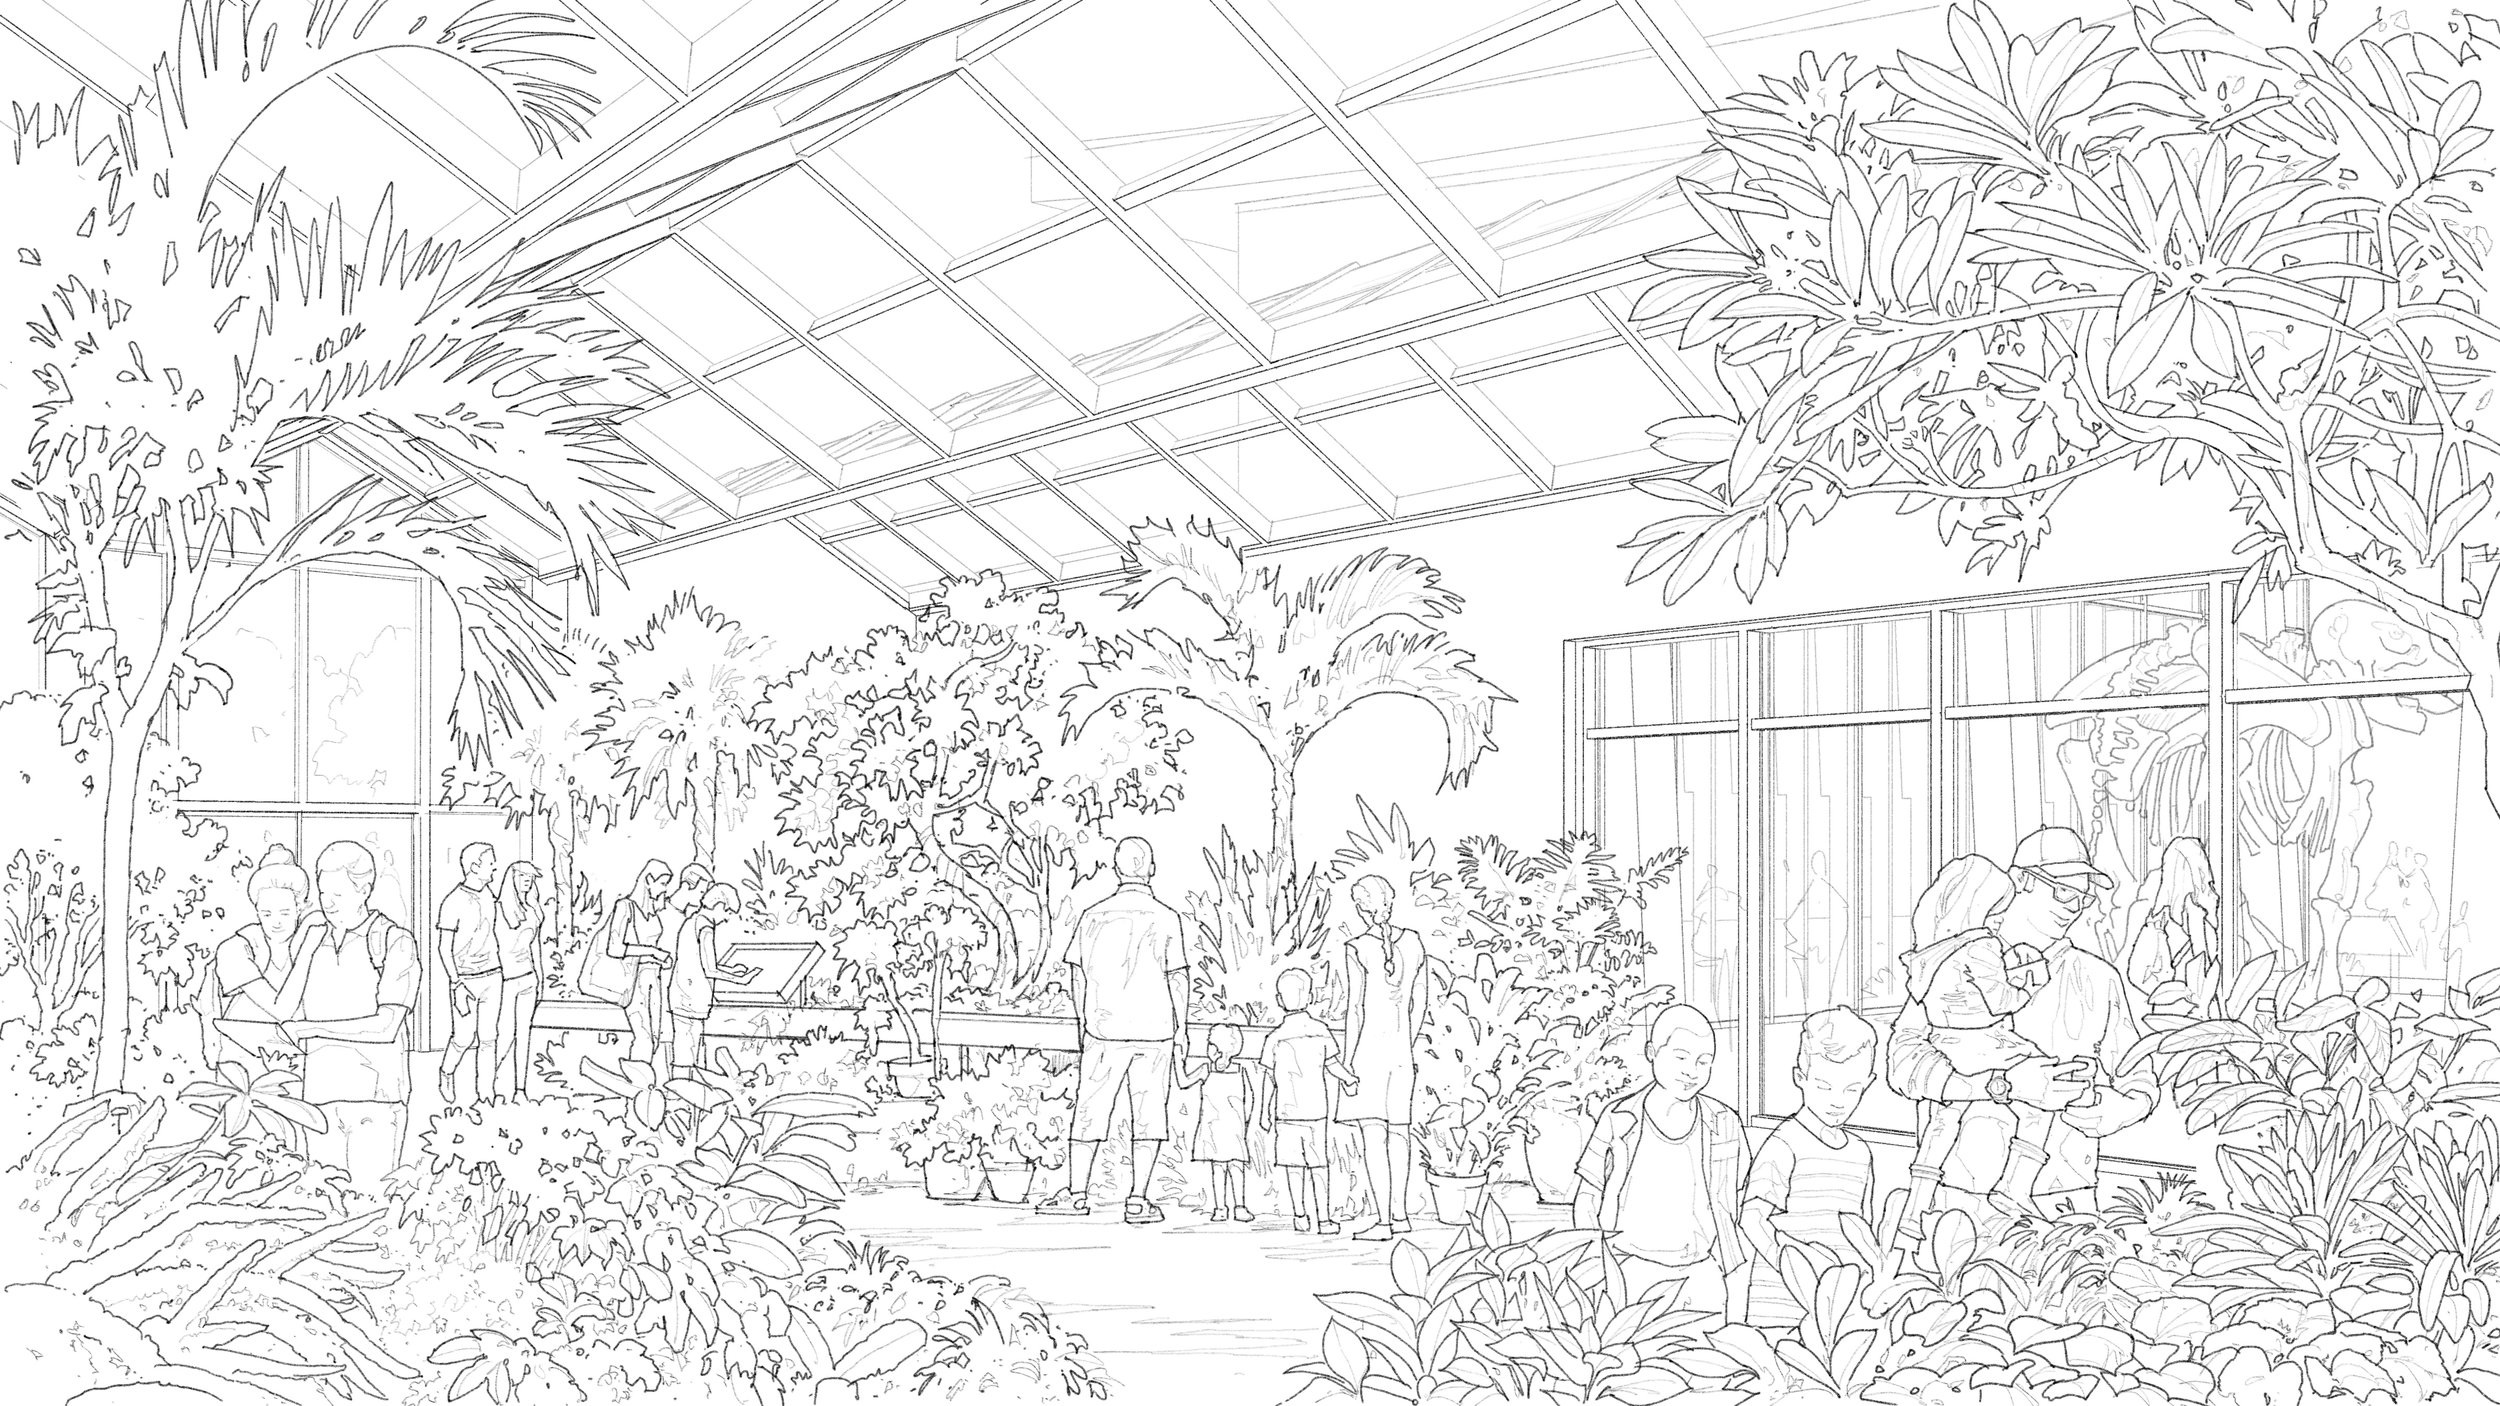
Step 3: Final Drawing
As the final drawing progresses, the line will be delineated to the appropriate level of detail determined by the client. The depiction of architectural details, urban design elements, and all entourage will be refined during this phase to further hone the vision of the rendering. This phase is critical, as all of the small details that bring character and a life-like feel to the image are more thoughtfully composed and carefully drawn.
The final drawing will be reviewed once more by the client to make any comments before the image is rendered.

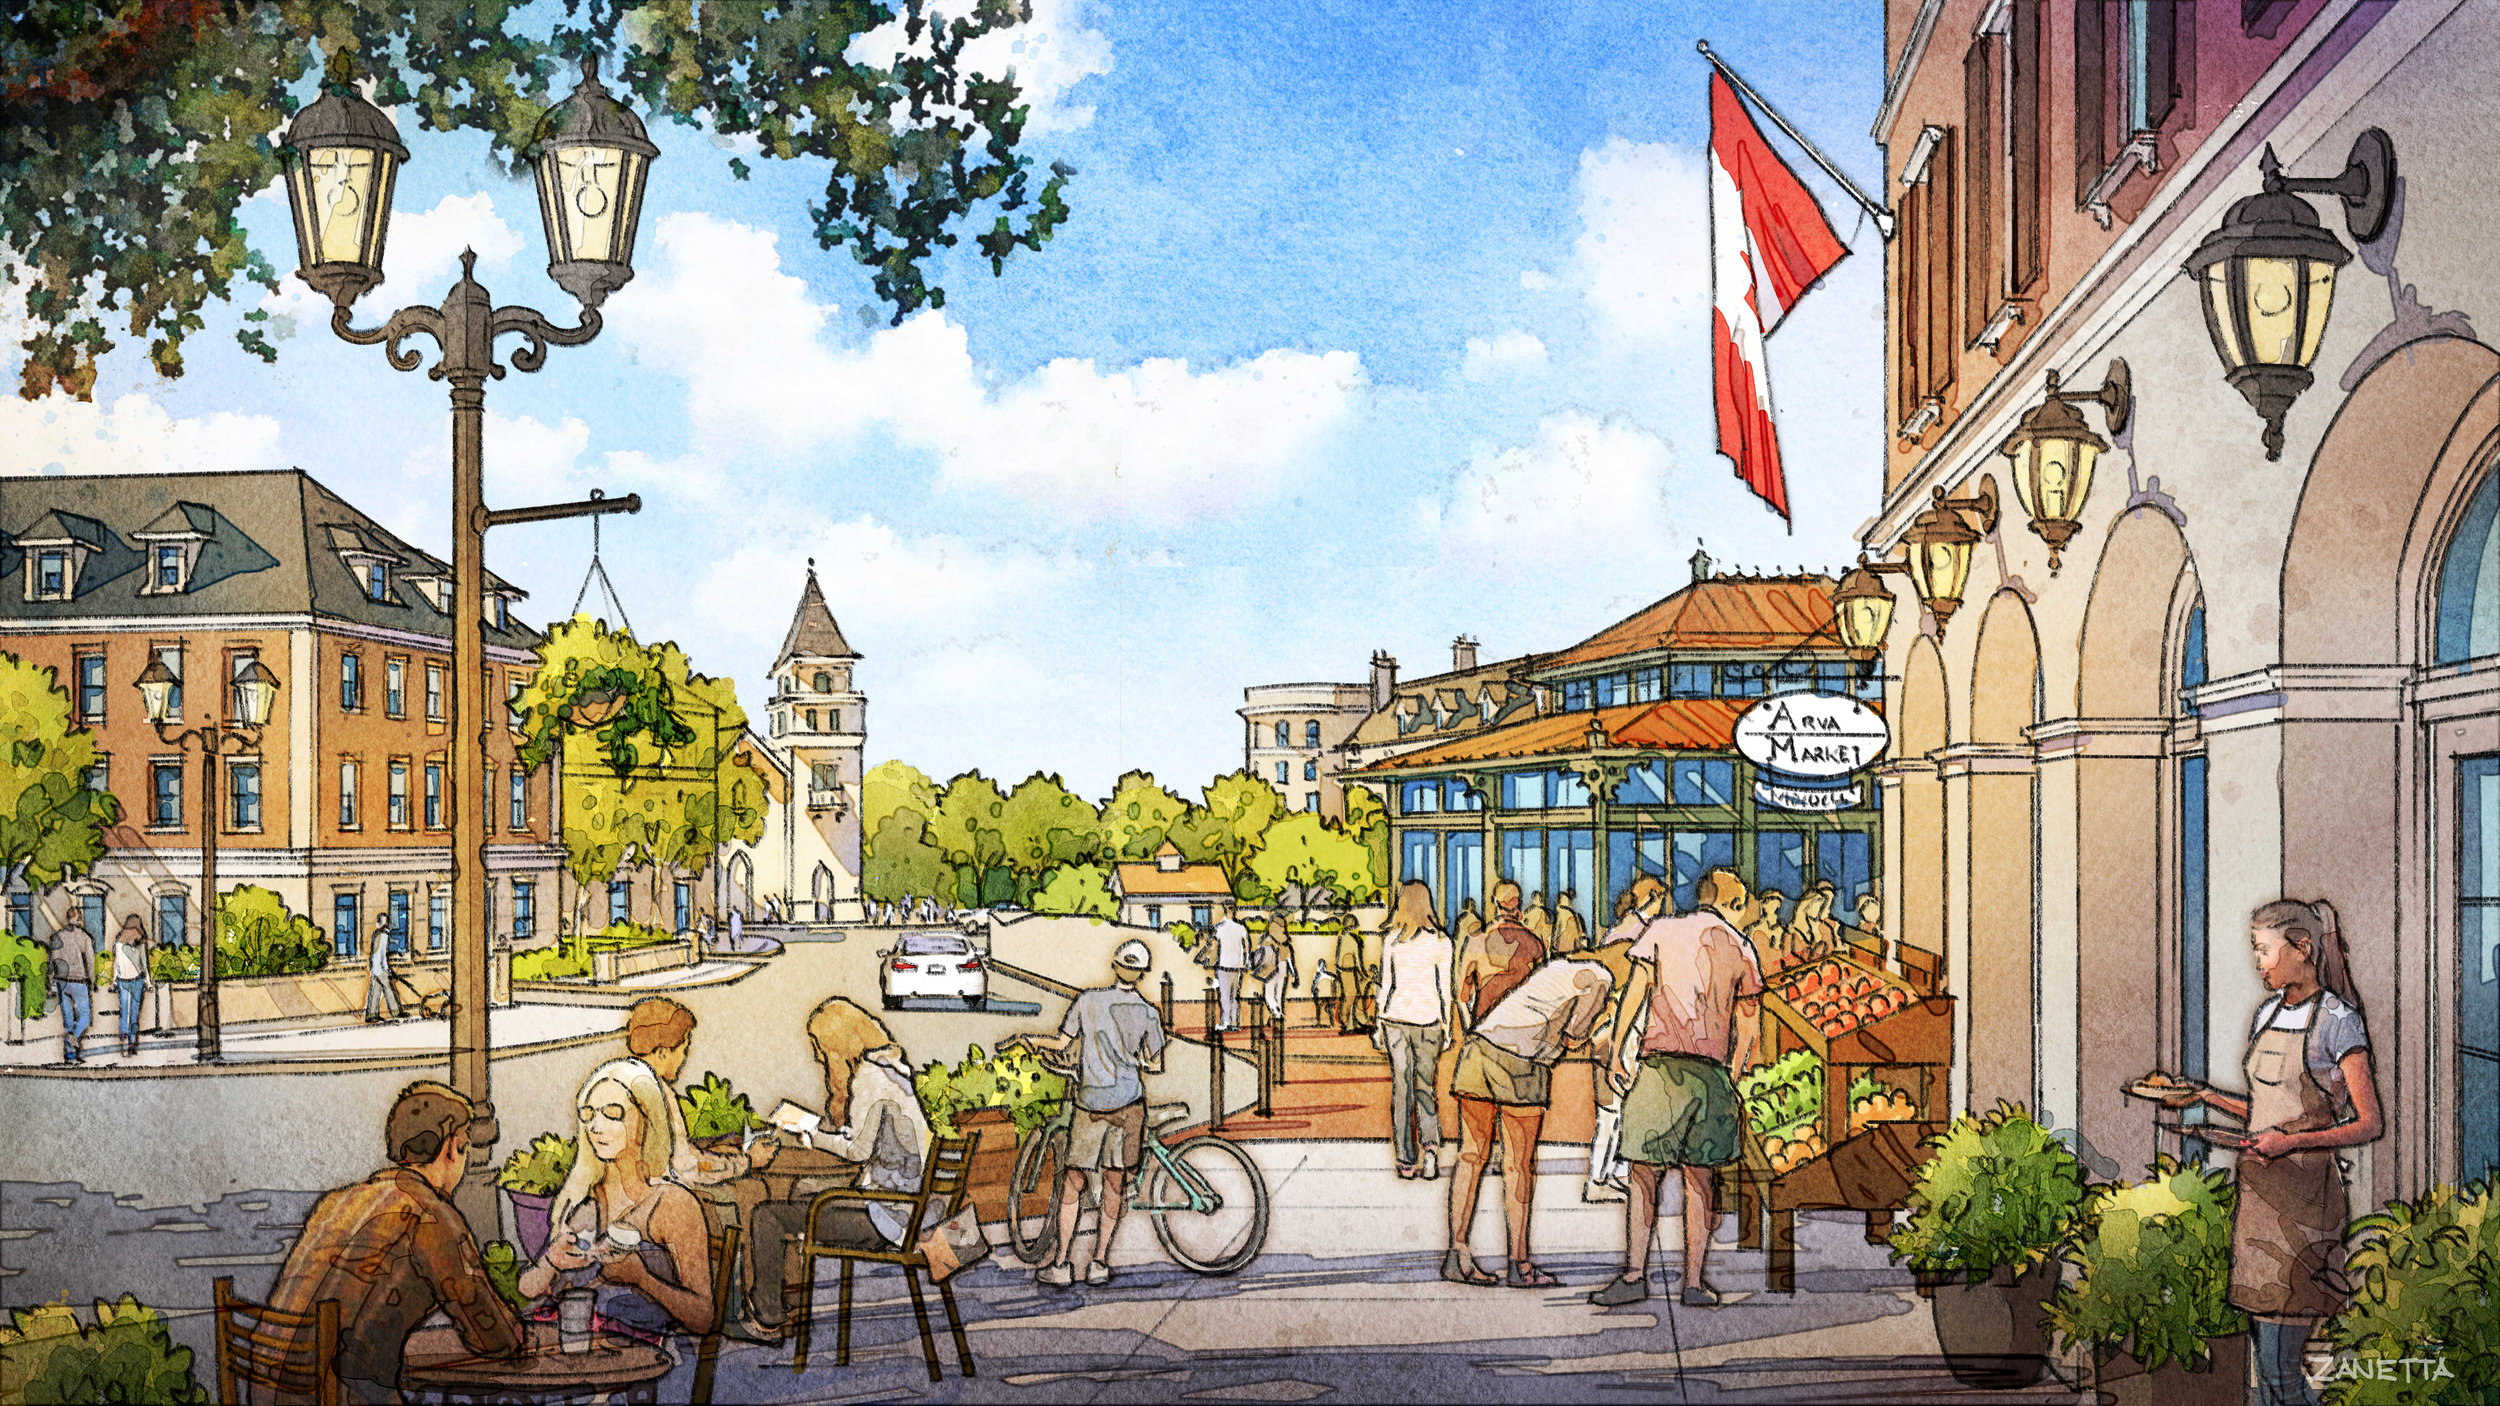
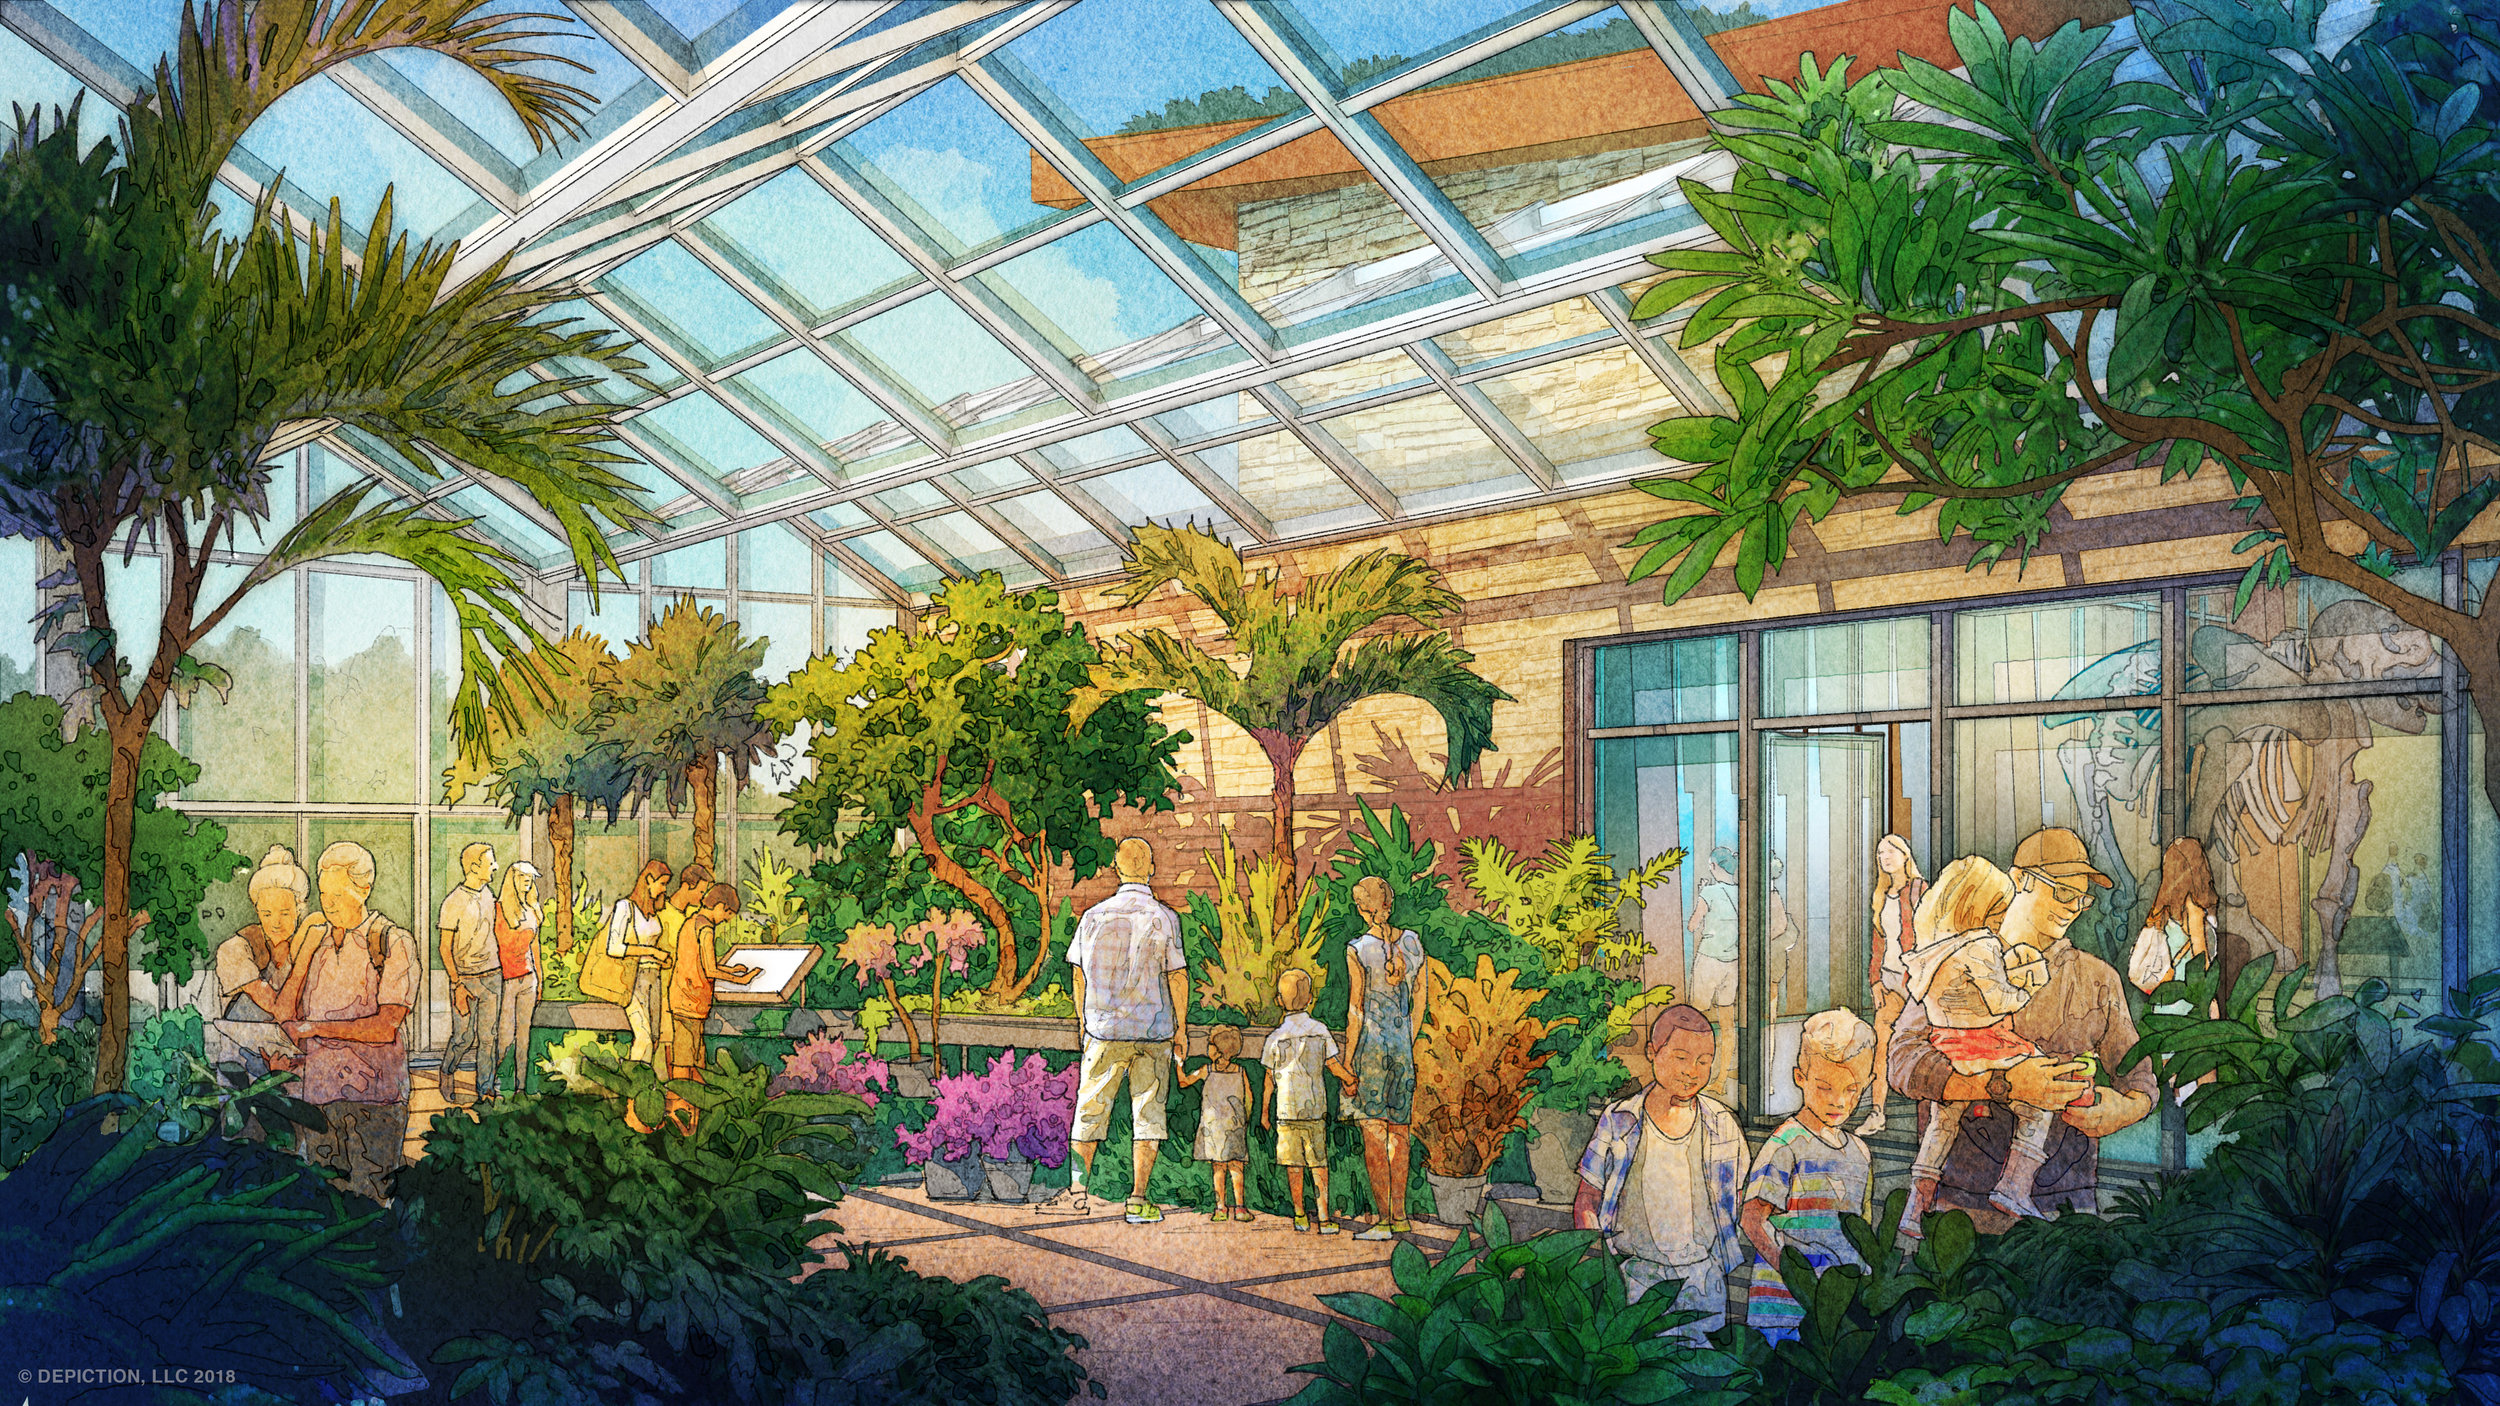
Step 4: Final Rendering
The final step in the process is to render the image. Style, value, color scheme, and time of day are decided upon by artist and client to further enhance both the narrative and architecture. Images are digitally produced to mimic watercolor renderings. This allows our process to be flexible as designs evolve.
The rendering will once more be reviewed, and the client will be able to comment on the rendering portion of the process so we can make any final adjustments if necessary. At this point, the perspective drawing will be complete. It is our goal as a studio that our clients enjoy the collaborative process as we believe it makes for a better final product.
In collaboration with New Urban Design Group

In collaboration with Svigals + Partners